Ero sivun ”Cellmapper/en” versioiden välillä
(Ak: Uusi sivu: 5. Upload your recorded data to the Cellmapper server by opening the '''Cell List''' tab and '''Upload and Statistics''' tab. You should always upload your newly measured base stat...) |
|||
| Rivi 41: | Rivi 41: | ||
| − | 5. | + | 5. Upload your recorded data to the Cellmapper server by opening the '''Cell List''' tab and '''Upload and Statistics''' tab. You should always upload your newly measured base station so that somebody else won't have to go and redo it, and they can instead view it from the map. The cellmapper map is updated nearly instantaneously . |
[[Tiedosto:Screenshot 2015-01-10-00-34-36.png|300px]] | [[Tiedosto:Screenshot 2015-01-10-00-34-36.png|300px]] | ||
Versio 28. heinäkuuta 2015 kello 06.11
Cellmapper is a useful application for locating 2G/3G/4G base stations. Cellmapper's maps are automatically updated by users who broaden the database by using the application.
While using cellmapper, pay attention to:
- Battery consumption rise (looks for GPS signals and checks network quality)
- Screen won't turn off while application is running (More battery consumption!)
- Base station location in urban areas is best determined by doing round trips of city blocks. At more rural locations you should do larger sweeps to save time. You will get the best result on flat ground.
- Ensure that you have a sufficiently good connection to the base station as well as a GPS connection.
Scanning
1. Download for Android Cellmapper application.
2. Enable GPS (not Google's location service)
3. Start the application. Ensure that you are connected to the 2G/3G/4G base station that you wish to measure. You need to have a data plan / contract with the operator, whose connection you wish to measure.
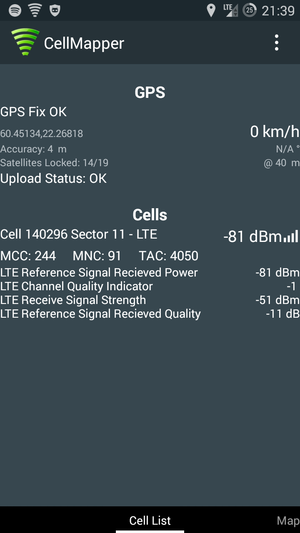
In the Cell List tab you can see if GPS has been connected properly (GPS OK) as well as your base stations information.
In the picture we have connected to "Cell 140296" base station in an LTE network. GPS has determined location by 4 meters accuracy and 14 out of 19 satellites have been connected to.
4. Maps tab
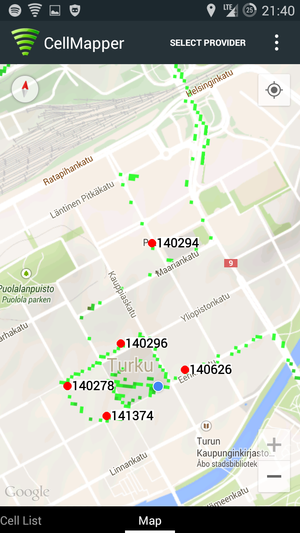
In the maps tab you can see the location of already mapped base stations. The application will automatically only show the base stations of the current network (LTE in the picture). The location of base stations can also be viewed from the Cellmapper webmap. The base station is marked on the map as a red dot in mobile and a red arrow in a browser. By clicking on the base station you can see it's range as a black zone. Light green indicates best signal quality, dark green good quality, black average quality and red the weakest signal quality. .
By pressing Select Provider you can switch the operator and network you wish to measure.
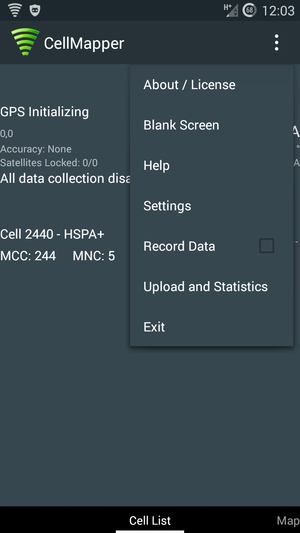
Put a tick into Record Data so that you measurements will be collected for uploading.
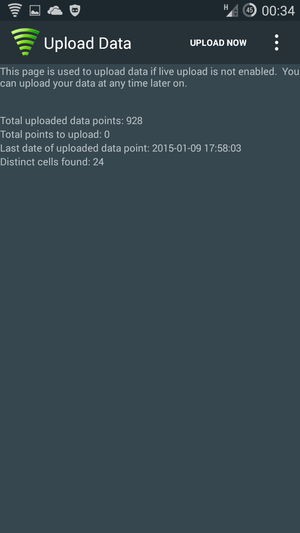
5. Upload your recorded data to the Cellmapper server by opening the Cell List tab and Upload and Statistics tab. You should always upload your newly measured base station so that somebody else won't have to go and redo it, and they can instead view it from the map. The cellmapper map is updated nearly instantaneously .
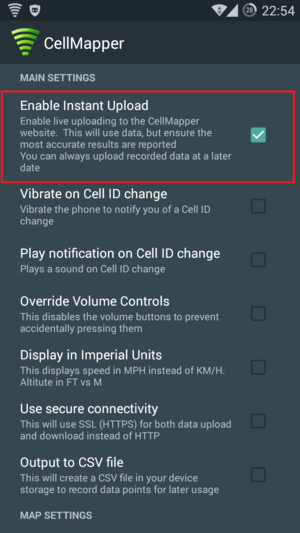
Automaattinen tiedon lähettäminen
Tämä mahdollistaa automaattisesti tukiasemien tietojen lähettämisen Cellmapperin kartalle.
Avaa sovelluksen asetukset ja rastita Enable Instant Upload
