Creating a bootable USB flash drive
In this manual we will create a bootable USB flash drive. We will put a windows operating system image on the flash drive, but you can use this same procedure with nearly any other operating system or utility disc images.
You will need:
- A flash drive with sufficient space for the image. For 32-bit windows a 4GB stick will suffice and for 64-bit an 8GB will suffice.
- The windows disc image.
- YUMI (Your Universal Multiboot Installer) software, which you can get from http://www.pendrivelinux.com
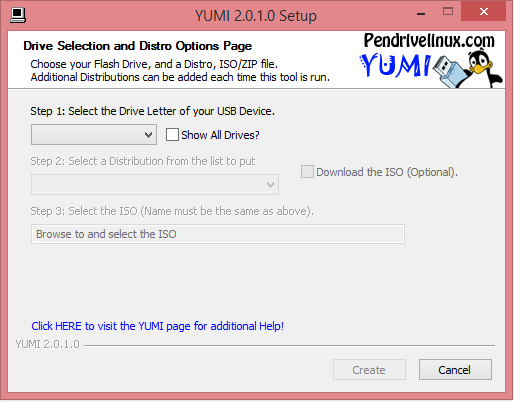
Start YUMI and proceed to this screen:
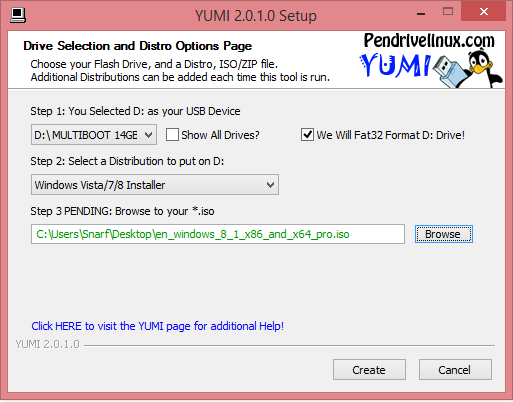
In "Step 1:" we choose which flash drive or other USB device we want to use.
In "Step 2:" we select what image we want to put on the flash drive.
In "Step 3:" we enter the path of the image, just find the image where you placed it on your computer. Select the image file by double clicking it.
After you have selected which USB device you wish to use, you can also select the box "Format Drive (Erase Content)?" if you wish to format (completely empty!) your flash drive before proceeding with the image installation. This is recommended, the process might not be successful if you don't. NOTE! All data that is stored on the flash drive will be lost upon formatting the drive! Save any data you do not wish to lose before proceeding.
Kun olet asettanut kaikki tiedot paikalleen, paina ”Create”-nappulaa. Ohjelma pyytää vielä varmistuksen, jonka hyväksyt painamalla ”Yes”. Ohjelma alkaa nyt luomaan bootattavaa tikkua. Odota, että ohjelma on raksuttanut loppuun, voit sillä aikaa hakea vaikka kahvia. Ohjelman valmistuttua paina ”Next”. Tämän jälkeen ohjelma kysyy haluammeko pistää lisää imageja tikulle samantien, mutta me emme halua ja vastaamme ”No”. Tämän jälkeen painamme ”Finish” ja tikku on valmis. Tutturuu!

